Bike light buying guide: the best light pattern?
In general you can say that the light pattern is more important than the lux and lumen values. In this article you will learn why, and how to compare light patterns to decide what fits your riding style best.
What defines a good light pattern?
With efficient optic design, you can get a very good light pattern even with lower lux values, so we advise you to compare different values and light patterns before deciding which light is most worth the money. The design and technology of the optical elements (lens/reflector) and the bike light itself will affect how well, and in what way, the light is distributed.
Here you can see an example image of how the same amount of lumen can be used more or less efficiently (lux). Even though the “strenght” of the light is the same (lumen), you get much better visibility with a lower lux value, meaning the same light is spread over a bigger area:

The shape of the light pattern is an important factor depending on where you ride
For regular road cycling you want to illuminate the road far ahead, and your ride will be quite fast, straight, and stable, so you might prefer a longer, narrower light pattern.
A wider light pattern is a good choice if you ride your bike on country roads and also want to see to the side of the road.
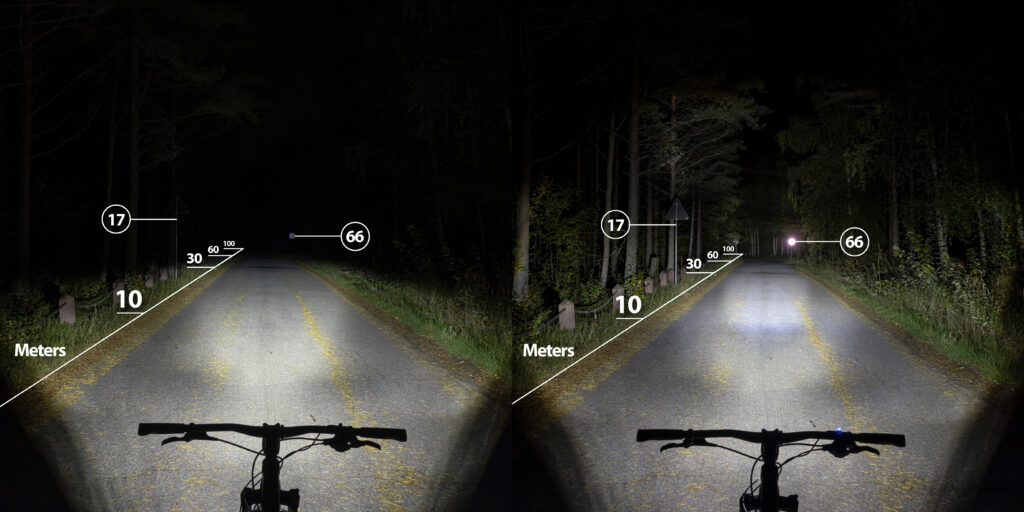
A wider light distribution is preferable when riding on trails in the forest or mountains. The paths can be winding, and your ride is less stable and straight than on a road, so a wide light pattern helps you see where you are going. It’s also better if the contrast between the light and dark area is soft, not too sharp to the sides. A good example is our Nordic Xtreme with low beam (left) and high beam (right):
Easy on the eyes
Most professional bike light manufacturers provide images of their bike lights’ light patterns. Generally speaking, the light distribution should be even, with as few disturbing lines or irregularities as possible, to give you a “calm” light that illuminates the road ahead safely.
The light should be white only, to be as bright as possible, without any blue or yellow color disturbances from the LEDs.
Some light patterns are brighter closer to the bike and dimmer further ahead, or vice versa. Others have brighter and darker areas, some are more homogenous. Some light patterns have sharper borders and some fade more softly to the sides. Personal preference is also a matter in the case, the main thing is you should feel safe that you can see well enough and that you will be seen by others where you ride.
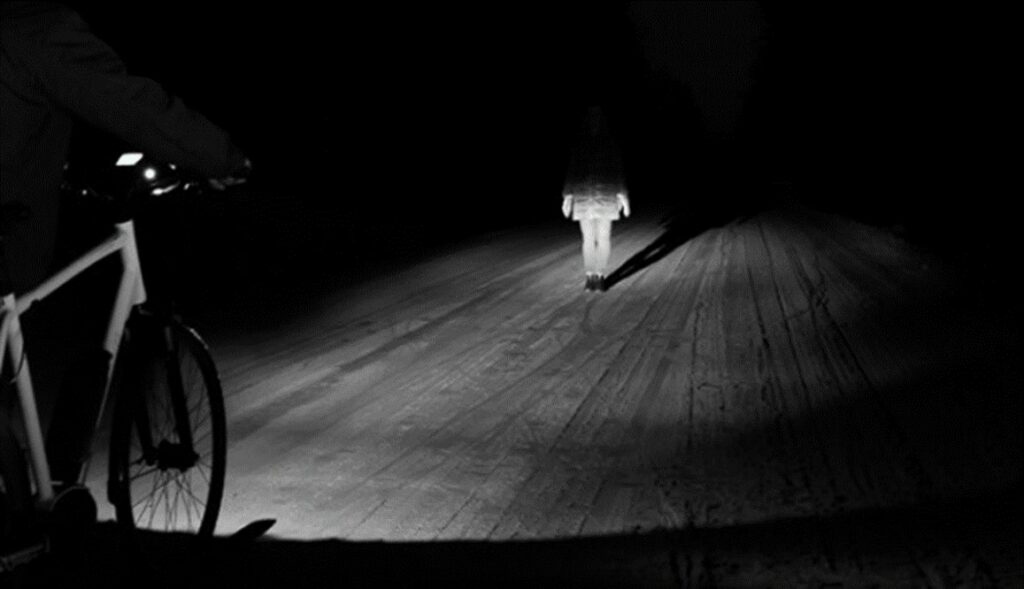
The cut-off line of the light pattern is very important, meaning “how high the light shines”
Always make sure that you set the light correctly not to dazzle oncoming traffic. A bike light with a sharp cut-off line is easier to set to the right angle on your bike, so you can see as far as possible without the risk of dazzling anyone else. With a too soft cut-off line it can be difficult to know if your own light is disturbing others or not. Especially with strong bike lights this is very important – if you go for high lux and lumen values, you should ensure that the cut-off line is sharp. This example explains it well!
This article is part of a series, also read: